Advanced budgeting allows you to split your total campaign budget into multiple budget flights: each with its own start date, end date, and allocated budget. This means you can now schedule budget allocations in advance, without needing to manually adjust your campaign as time goes on.
By enabling pre-scheduled budget allocation, advanced budgeting makes campaign management significantly easier. It’s especially beneficial for advertisers managing large or ongoing campaigns who need fine-grained control over how budgets are distributed across time. This helps you save time, avoid manual changes, and ensure your budget is spent effectively throughout the campaign’s duration.
How to use advanced budgeting
1. Go to your Campaign Budget Settings and click the new Advanced Budgeting button.
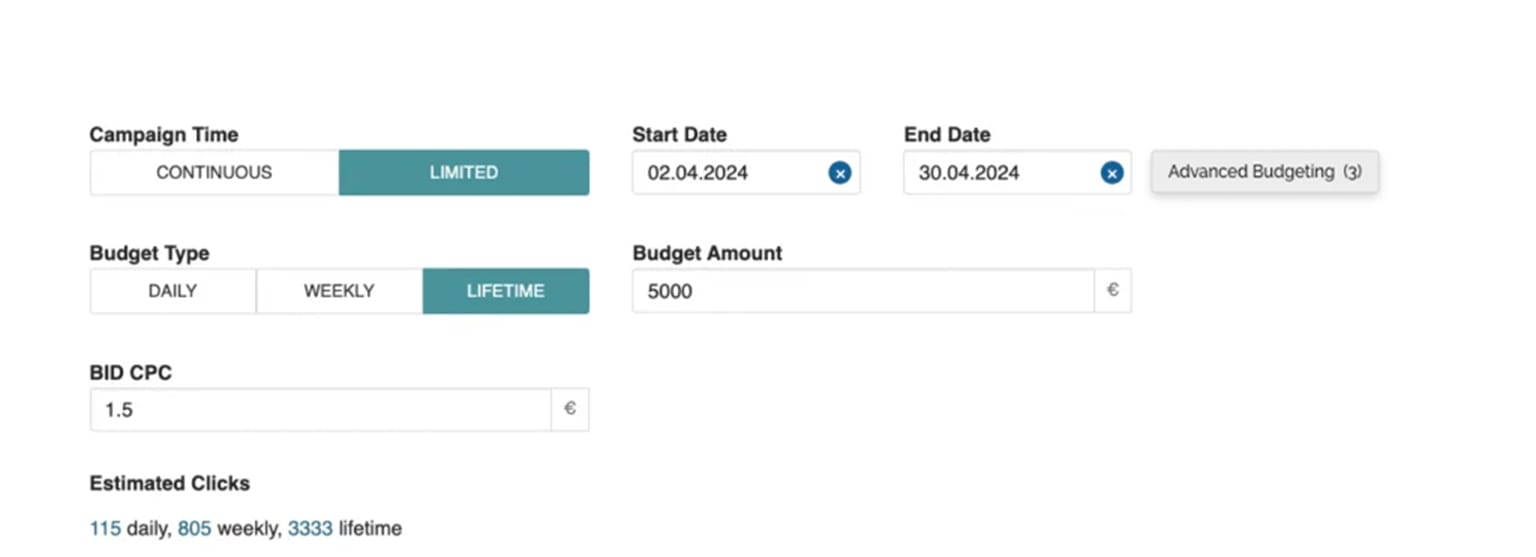
2. A new overlay will appear. By default, advanced budgeting is disabled, and no budget flights are available.
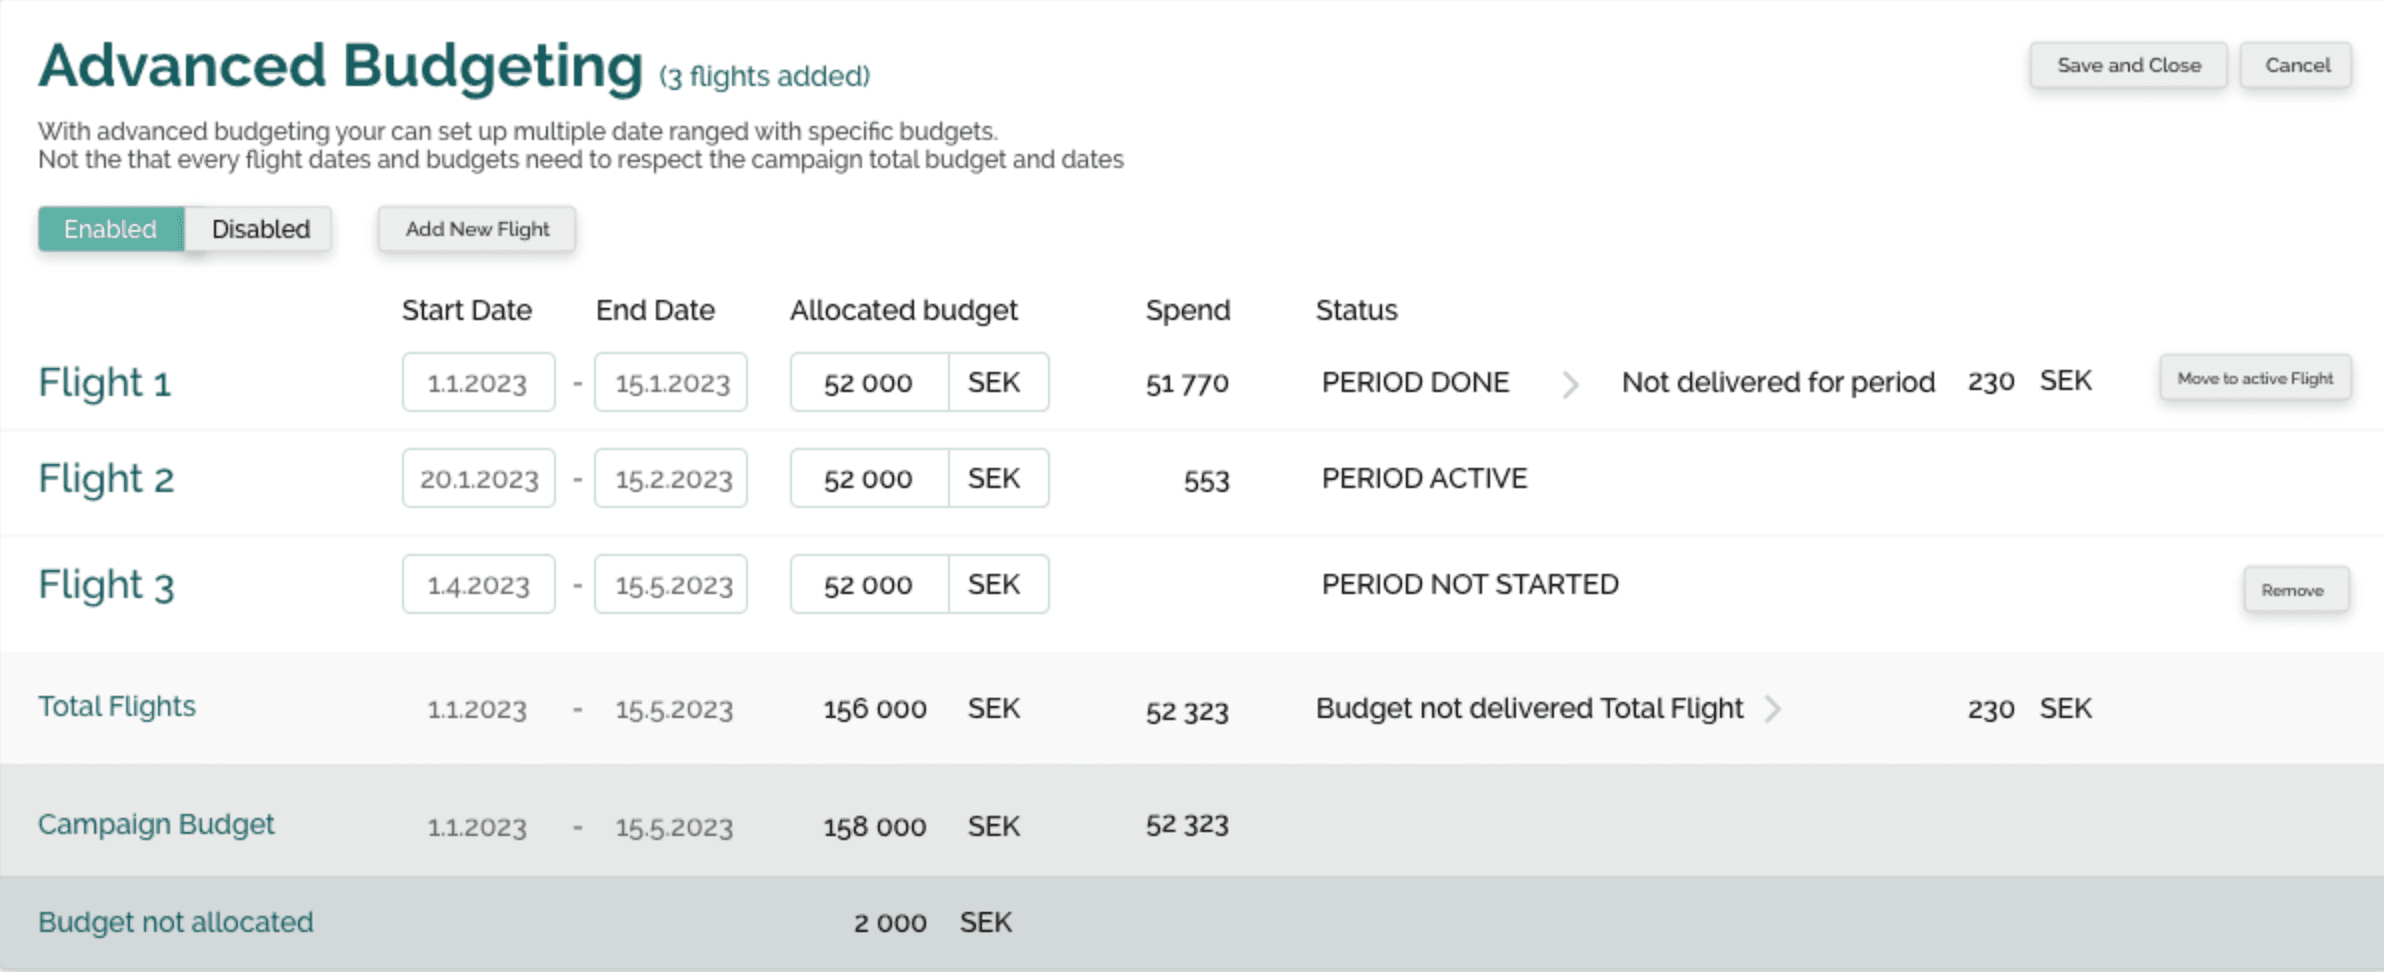
3. Adding budget flights:
– Click “Add Flight” to create a new budget line.
– For each flight, specify a start date, end date, and the budget amount.
– You can add as many budget flights as needed.
4. Moving budget to a new flight
– If your budget hasn’t been fully spent during a specific flight, you can easily move the remaining budget to an active flight with a single click.
– When you move budget this way, the selected flight’s budget will be reduced, and the same amount will be added to the active flight. This ensures the total campaign budget remains accurate.
– You can also manually adjust budgets between active and future flights as needed.
Additional notes
– Budget flights cannot overlap in time.
– Total flight budgets can’t exceed the campaign’s original budget.
– Ad group-level settings — such as max clicks or ad group start/end dates — will override the campaign’s advanced budgeting settings.
– You can easily move non-delivered budgets to another flight.